Looking for a creative and simple way to showcase your child’s school artwork? Painted cork board strips are the perfect solution. This cork strip display project is a quick, easy, and colorful way to show off your child’s creative efforts—plus it keeps the fridge clutter-free! With a few simple materials and an hour or two of crafting, you’ll create a fun wall feature they’ll be proud to use.
Happy painting!
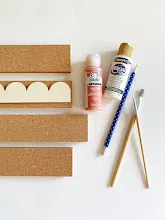
Materials You’ll Need
- Cork board strips (pre-cut or cut from a roll)
- Acrylic or latex paint
- Paint brushes or small foam rollers
- Stencil (if adding design to cork)
- Ruler and pencil
- Scissors or utility knife (if cutting cork)
- Mounting tape, Command strips, or wall-safe adhesive
- Drop cloth or old newspapers
- Optional: Clear sealer spray or Mod Podge for durability
Joanna Gott
Step-by-Step Instructions
Step 1: Choose and Measure Your Wall Space
Pick the wall area where you want to hang the cork strips. Over a desk, under a shelf, or along a hallway wall are great options.
Use a tape measure to decide how long your cork strips should be (if you are cutting your own strips). Mark the wall lightly with a pencil to visualize the layout. You can hang them horizontally, vertically, or in a grid.
Tip: Leave enough space between strips for larger art pieces or overlapping layers.
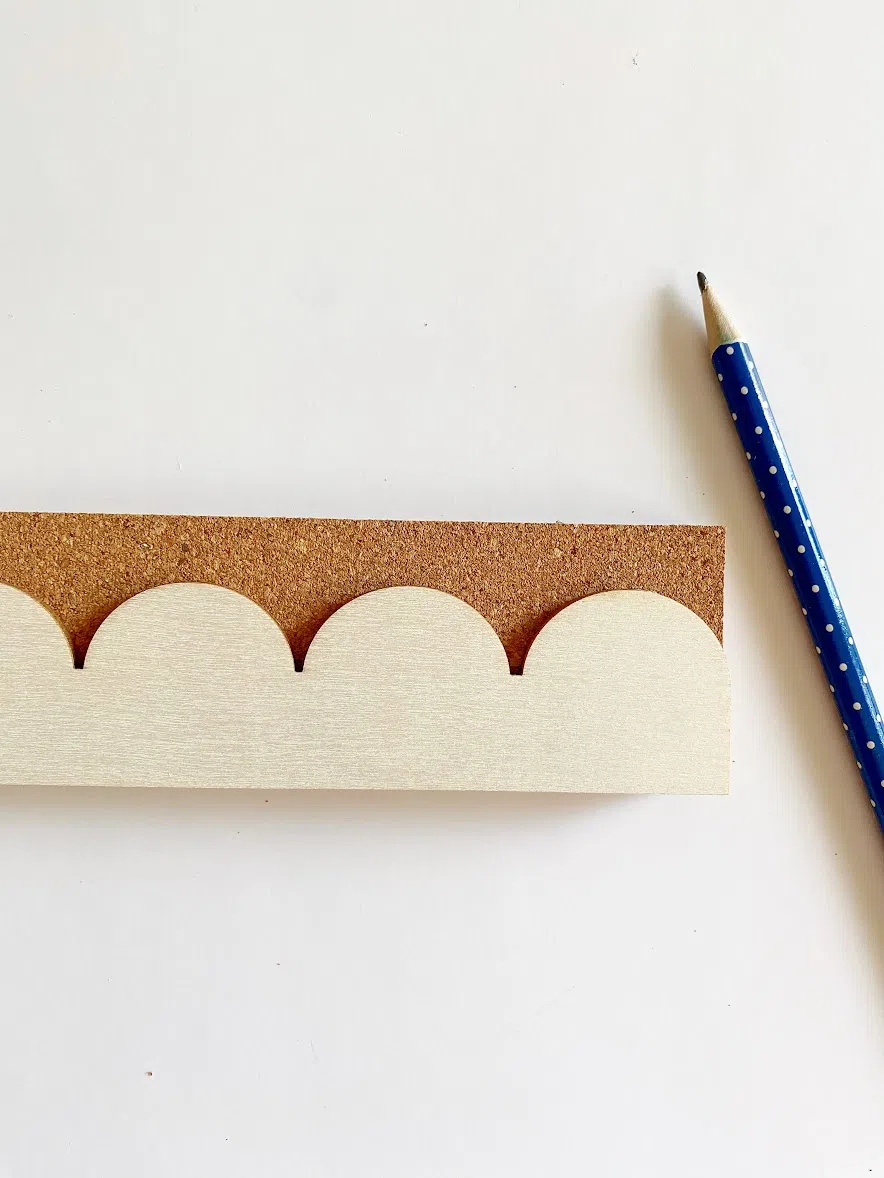
Step 2: Cut and Prepare the Cork Strips
If your cork isn’t already cut, use scissors or a utility knife and ruler to cut it into 2–4 inch wide strips, depending on your preference.
Lay them out on a protected surface (use a drop cloth or newspaper) and make sure they’re clean and flat.
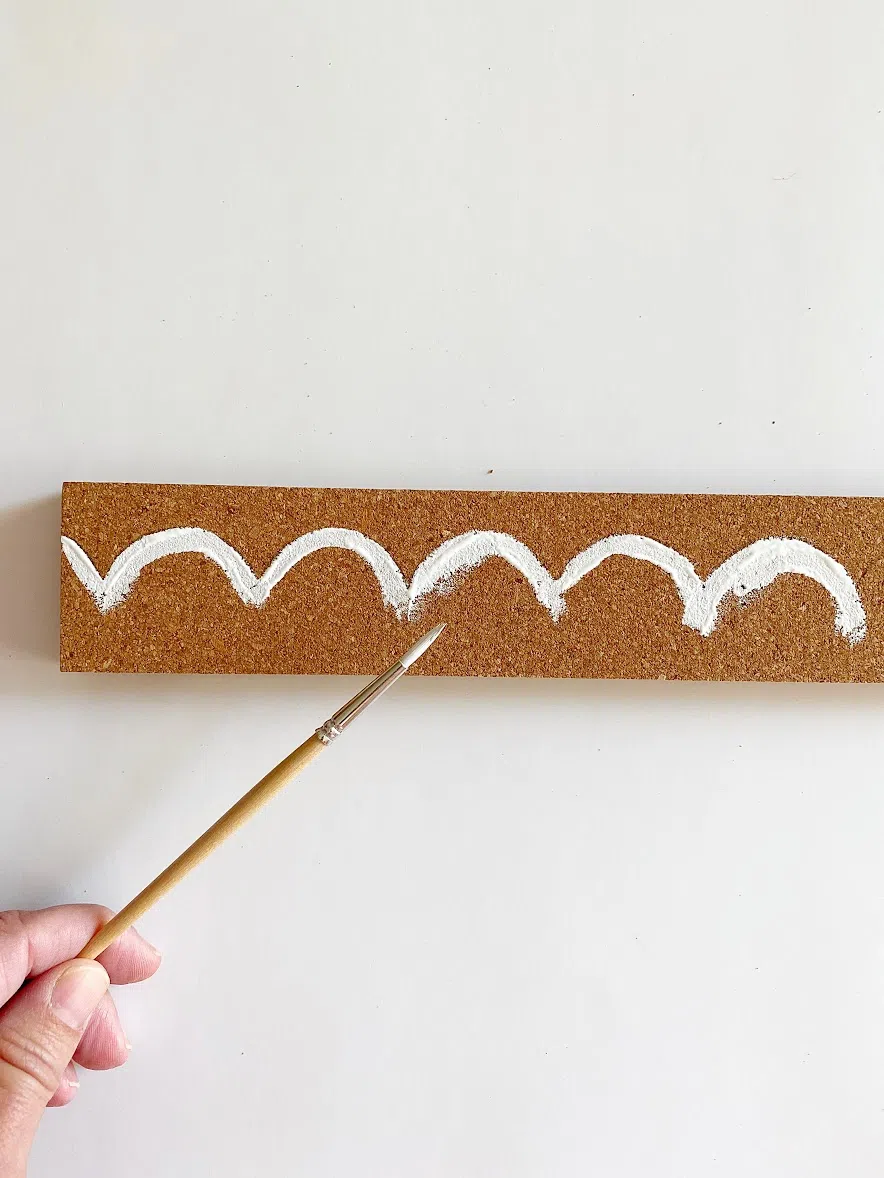
Step 3: Design and Tape Your Patterns
Joanna Gott
Use painter’s tape to create clean lines, color blocks, or fun patterns like stripes, triangles, or even polka dots (with stencils or sponge brushes).
I love all things scallop and Penny has scallop shelves in her room, so to match that we went with a scallop stencil.
Let your child help with choosing colors or sketching out a plan—it adds a personal touch and makes them feel part of the project!
Step 4: Start Painting!
Use a brush or foam roller to apply acrylic or latex paint. Acrylic works well for bold, fast-drying color. Latex paint is great if you’re using leftover wall paint for a matching look.
Joanna Gott
Apply 1–2 coats as needed, letting each coat dry thoroughly (usually 15–30 minutes depending on paint type and thickness).

Joanna Gott
Don’t worry if the cork absorbs some paint—this is normal. Just go over it again if needed.
Step 5: Peel the Tape and Let Dry
Carefully remove the painter’s tape while the paint is still slightly wet for cleaner lines. Allow the cork strips to dry fully—usually a couple of hours or overnight.
Optional: For added durability and to prevent paint chipping, you can spray a light coat of clear acrylic sealer or brush on a thin layer of Mod Podge.
Step 6: Mount the Cork Strips to the Wall
Once the strips are dry, attach them to the wall using one of the following:
- Command Strips: Ideal for renters or if you want to avoid nail holes.
- Double-sided mounting tape: Strong hold and easy application.
- Wall-safe adhesive or small nails: Best for a more permanent installation.
Use a level or ruler to line them up evenly. Press firmly for a secure hold.
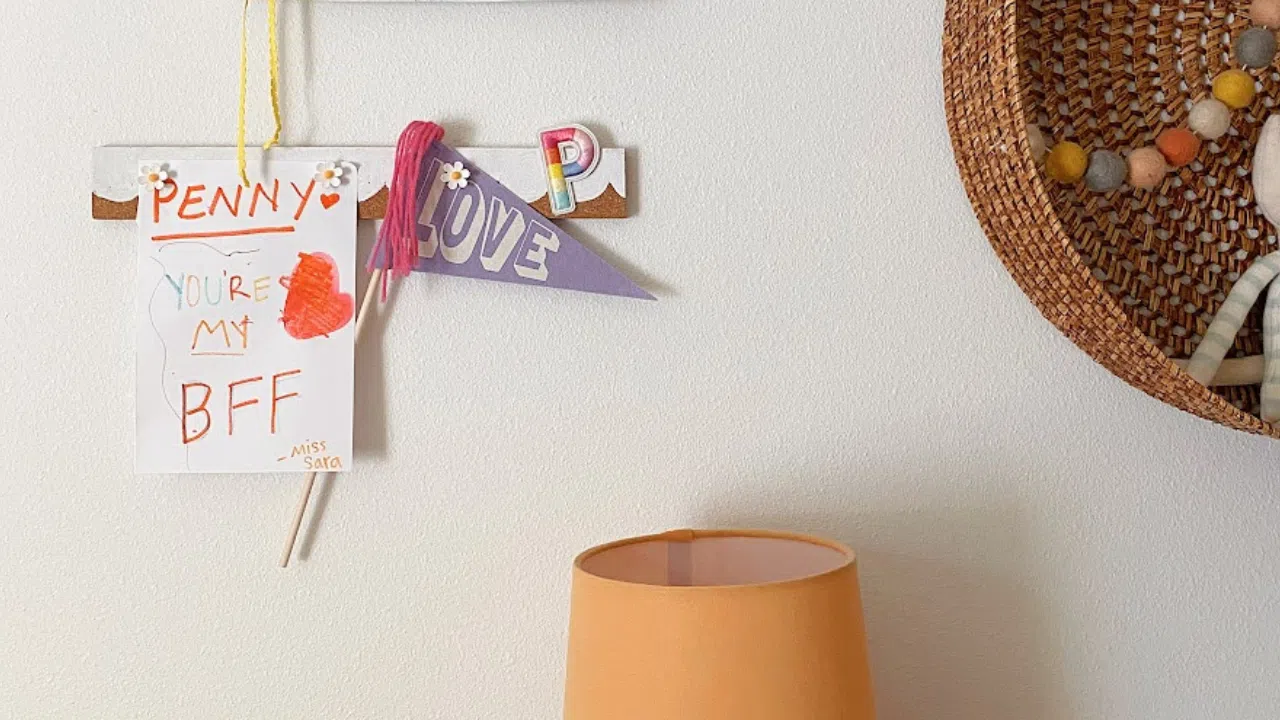
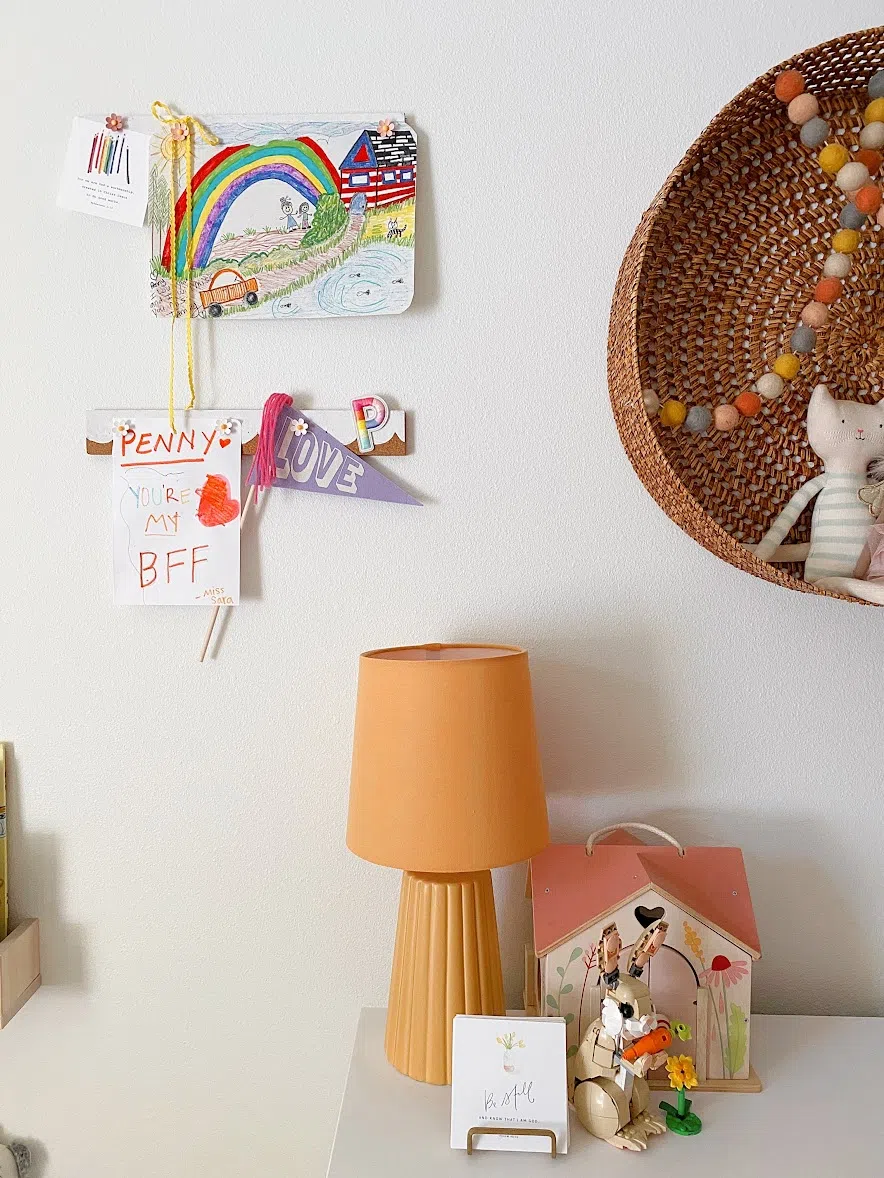
Step 7: Display the Art!
Now the fun part—hang up your child’s latest artwork! Use push pins, tacks, or small clips to attach drawings, paintings, and awards.
Joanna Gott
You can rotate the display regularly to keep it fresh and celebrate your child’s creativity throughout the school year.
Bonus Ideas
- Let your child pick the paint colors to match their room or favorite themes.
- Add name tags or labels with washi tape for a classroom-style gallery.
- Use themed stencils (stars, hearts, dinosaurs) for extra fun designs.
PIN THIS!
 Read more of Joanna’s contributions to AllMomDoes here.


Comments